


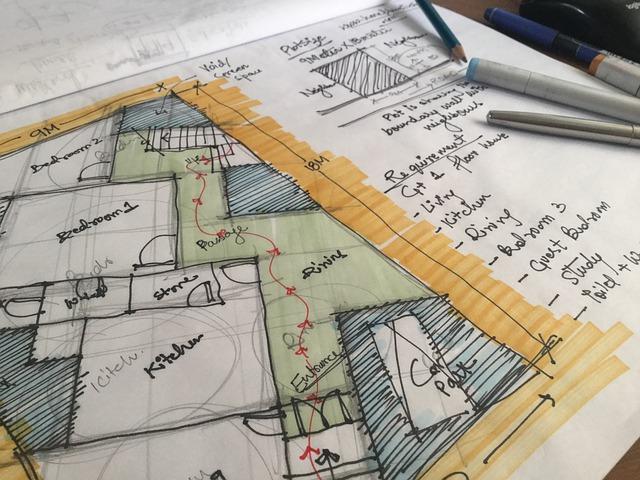

A floor plan is a virtual representation of a building layout scaled from the top view.
It was formally done by only architects, but as of today, it is also sketched by homeowners and real estate agents.
A floor plan design software makes it easy for architects and homeowners to draw their plans. But some still prefer to draw with bare hands. If you’re in this category, you have nothing to worry about. We’ve got your back.
Who Needs a Floor Plan?

Do you want to build a house or sell a house? Floor plans are necessary for better representation of the building design proposed to be built or sold.
If you intend to build a home or renovate one, drawing your floor plan yourself helps you to express your design to the architect better. It gives the architect or builder a full understanding of what you want.
As a real estate agent, it may seem a little time consuming to start drafting out a floor plan, but it does a better job at convincing buyers more than a photo.
When you put up the floor plan of a house along with the photos of the interior and exterior of the building when marketing, it yields more results. You must take your time to draw out a floor plan. And doing it with hands is much easier if you don't have prior knowledge.
Why Some People Prefer to Draw their Floor Plans Manually
First, design software is not easy to understand. One thing is to know how to draw a plan and another is to know how to use the software. Most software packages appear to have been designed to be friendly to unprofessional users, but many still find them hard to operate.
Secondly, many software will cost you a few dollars. They may appear to be free but you still need to pay to unlock certain features along the line. These two factors are the primary reasons some people opt for drawing their floor plans with their own hands. And in other cases, they opt for buying ready-made house plans.
Essential Tools Needed to Draw a Floor Plan
- Architectural scale
- Adjustable triangle
- T-square
- Mechanical pencils and leads
- Erasers
- Compass
- Symbol template
- Masking tape
- Utility knife
- Big flat table
- Long metal ruler
- Tracing paper
- Tape measure
Step By Step Guide On How to Draw a Floor Plan By Hand
1. Measure the room
Using the tape measure, take a corner to corner measurement of the rooms. If there is baseboard available, run the tape on top of the baseboard. But if there is none, run your tape along the floor. You can request for help and have someone hold the other end of the tape to facilitate accuracy.
2. Add measurement to a rough sketch
A pencil and blank paper can simply be used here. Jot down your room measurements in a free sketch. For rectangular rooms, write the measurements close to corresponding walls.
If closets and angled corners are present in the room, fill their measurement in the right spot. Fests or inches measurements should be written like 15̎ or 15' and metric measurements as 5.2m or 5.25m.
3. Draft with an architect's scale

House plans usually use a scale of ¼ inch to one foot. They’re often represented as 1/4̎: This means that you draw quarter-inch to represent one foot of the real house. Using an architectural scale is not difficult. For instance, if you need to draw a 30-feet long exterior or interior wall, follow these steps.
- Lay the architectural scale on the paper or graph
- By the zero marks on the scale, make a small pencil mark on the paper. Make the same mark on your paper by the 30 marks on the scale
- Then use the straight edge to draw a line according to the two marks
The line you have drawn should measure 7.5 inches, which represents 30 feet of the real house. Accuracy is crucial in this stage. Measure all lines correctly.
4. The blueprint
Lay a sheet of paper of 24̎ by 36̎ on a working surface. The longest edge should be horizontal. Save the lower right corner for your title block, which should contain the name of the view, scale, house name, designer's name, and date. The date is very important because it's easier for the builder, designer, or buyer to know how recently the plan was drawn or edited.
5. The exterior walls
It’s time to layout the shape and dimensions of the house. For simplicity, we will use a rectangular shape, which is a fundamental shape. It is standard to have the door at the lower side of the sheet. But if your home has a different shape, you can alter this and draw what you have. Follow these steps for a start;
- Draw a total dimension of the first wall with a straight edge, pencil, and architectural scale until it meets another wall
- The next wall should be drawn with a T-square and architect's scale. Continue until you have drawn the inside framing walls of the building
- Then, draw the outside framing. Let's say you are framing with 2 by 6s; your exterior will be 5.1/2 inches thick
6. Interior walls

If you are using 2 by 4s for interior walls, the actual thickness will be 3.1/2 inches. This is because they are run through with a half-inch of both their width and thickness. If there are stairwells in the house, draw a wall around them so that they can be visualized as a room. Not all stairwells have a wall around them. If yours fall under the category of those that don't need a wall, you can just draw a fault dotted lines to mark the area.
7. Add doors and windows
Your plan is now set for windows and doors. But before you draw the doors and windows, ice the scale to locate their positions. The door placement should be dimensioned from the center of the wall placement. Doors are usually 2 feet 8 inches. As for windows, it is necessary to maintain reasonable spacing and size. They are also dimensioned from the center of the wall. Then, label the rooms at the center—label everywhere, including open closets and entrance.
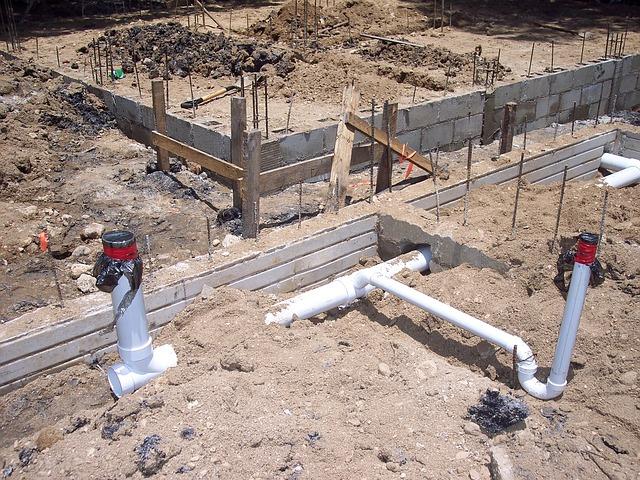
8. Add appliances, fixtures, and plumbing
You can either use symbols in blueprint templates to represent your appliances and fixtures or simply use lines. Since lower kitchen cabinets are usually 2 feet deep, show them with solid lines. As for the upper cabinets that are usually 1 foot deep, represent them with dashed lines. Refrigerators and stoves should also be drawn with solid lines or labeled. Bathroom fixtures follow the same pattern.
9. Add electrical symbols
Symbols for outlasts, wall switches, wall lights, and doorbells should be put in their place. Since your view is from above, mounted fixtures such as ceiling lights and smoke alarms are to be drawn on the floor, right below the spot they are fixed.
10. Floor surfaces
Give details of the type of flooring in each room. Whether you want a single type of flooring for all the rooms or different types, simply label the room floor. Have in mind that it’s not advisable to use more than two types of flooring in a house as it will disrupt the flow. The flooring type would be labeled with a scale—for example, 1/4̎ tile over 1/2̎ plywood sub-flooring.
11. Draw dimensions
Add dimensions to the floor plan; this is to be done thoroughly. Nothing should be left without a scale. There have to be a dimension for rooms, closets, cabinet depths, distance from the wall to back of the toilet, sizes of tubs, and distances from walls to edge of any appliance or fixtures. One dimension line should run along each exterior wall for window opening and door openings.
12. Add Furniture

Furniture is not needed if you are planning for construction, but they should be included in a design plan. This way, your buyer is sure that there is adequate space for all rooms.
13. Clean up
Now is the time to finish up your floor plan and make it neat. Erase all mistakes. Darken the lines to show them properly using a straight edge and not free hand to avoid further mistakes.
14. Fill in the title block
This is the final stage. Draw out the title block in the bottom right-hand corner of the sheet. Provide columns for name, size, view, scale, and date as mentioned earlier.
Wrap Up
Your floor plan is complete now. Construction or designing will be much easier and faster. It will give your architect an apparent description of what you want. Floor plans are necessary for house sellers to catch buyers. They help buyers to see the full layouts and dimensions of the house to be bought. And they explain a lot more than photos will.
42 comments
Itangishaka Elie
can you teach me to drowing ahouse with 4 floo
rojmlloqwq
Muchas gracias. ?Como puedo iniciar sesion?
goqhuilohj
Muchas gracias. ?Como puedo iniciar sesion?
faytukcnpg
Muchas gracias. ?Como puedo iniciar sesion?
ivosrzvagx
Muchas gracias. ?Como puedo iniciar sesion?
Leave a comment
This site is protected by hCaptcha and the hCaptcha Privacy Policy and Terms of Service apply.